Run an Ethereum node on Debian with an External SSD (Mar 2020)
It’s 2020 and you should be running your own Ethereum node

Special thanks to Gregoire Jeanmart for writing the tutorial that got me off the ground running my own node, and which inspired me to write this. Most of the guide on external SSDs was taken directly from his tutorial, with his permission. Thanks!
Node runners are one of many unsung heroes of Ethereum. Especially now that the requirements have been considerably lowered, it’s easier than ever to be a node runner. You can run your node in the background of your preferred machine, and not sacrifice functionality. I hope this guide will be a comprehensive walkthrough on how you can get up and running.
Not only will you get up and running, but you’ll also see how to get MetaMask hooked into your node, and how to run a Swarm node on top of Geth.
This article assumes that you at least vaguely know what Ethereum is, or that you’ve read one of the many excellent articles explaining just that. It also assumes that you’re running on Linux (written for Debian-based distros, commands and locations may vary in other flavors of Linux).
Note: we are referring to running a full node (in Etherean), meaning not a light client and not an archive node. We’ll just refer to this as “running a node” throughout the piece.
What is an Ethereum Node?
A Step-by-Step Guide to Running a Geth Node
Requirements
Update: A few words on Ethereum Grid before we get started
Installation and Sync
- Setting up an external SSD
- Installing and setting up Go
- Installing Geth
- Syncing with Geth
Connect MetaMask
Run a Swarm Node
Note that this explanation is somewhat simplified.
The records of what has happened on the Ethereum blockchain are distributed around the whole world. This way anyone can access the entire history of Ethereum, and verify against other records that the history that they’re accessing is in fact authentic. Maintaining one of these copies of the history of the blockchain (and updating it whenever there is a new block) is called running a node. The node is your copy of the history.
When anyone wants to make a transaction, they broadcast this to a node. The node then broadcasts this transaction to other nodes on the network. Because of this and other benefits of having your own node, serious dApp projects tend to have their own nodes. This is also how miners can see what transactions are in queue to be mined into the next block. Similarly, a freshly mined block is transmitted to a node and then propagated throughout the system.
If you are a running a node, this means you’ll have a copy of the history of the Ethereum blockchain, and will be in constant contact with the other nodes about what’s going on over the network.
First, we should see if your computer has what it takes.
My understanding from looking around the web is that your CPU shouldn’t be a problem if you’re running on a computer. If you’re running on a Raspberry Pi or the like, I suggest you look at this tutorial.
The hard drive is the bigger consideration. While it may be possible to sync up to the chain with an HDD drive, the recommendation is SSD. At least 500GB is recommended. With the improvements in Geth, I can testify that it does not need to be an internal drive — an external SSD that connects by USB is fine. As far as stats go, I’ve seen that you should have at least 50MB/s (write/read). Gregoire has instructions for benchmarking your system in his tutorial, if you’re interested in knowing what your hard drive is capable of. In my personal experience, I had a SSD that clocked in at 150MB/s, and I'm not certain that it was enough. It couldn't sync to the tip even after a few months, though I'm not sure if there may have been other factors involed. Good external SSDs can clock in at over 300MB/s, though, so I would recommend doing your research and buying a good, fast drive.
(You may wonder for how long 500GB will be enough. While it’s true that the Ethereum blockchain has grown considerably over time, the amount that each node will need to store should decrease with Eth 2.0/Serenity. As of November 2019, the size of my node is roughly 175 GB. Even if the rate of growth picks up, and Eth 2.0 and sharding don’t arrive for a while, I believe that 500GB should hold out for some time. Of course, there’s nothing wrong with getting a whole TB, especially if you also want to run Swarm.)
As for internet connection, I’m guessing that you need at least 10 Mbits/s in order to not impede using your computer for other stuff. If you’re running on a laptop, and will have a slower connection sometimes, I would assume you could pause running your node while in slower areas, and sync back up when you’re back over 10 Mbits/s.
Lastly, have some patience. Even with all the speedups, the initial sync can easily take more than three days. On the bright side, we’re going to turn this into a background process, so it shouldn’t need much attention from you.
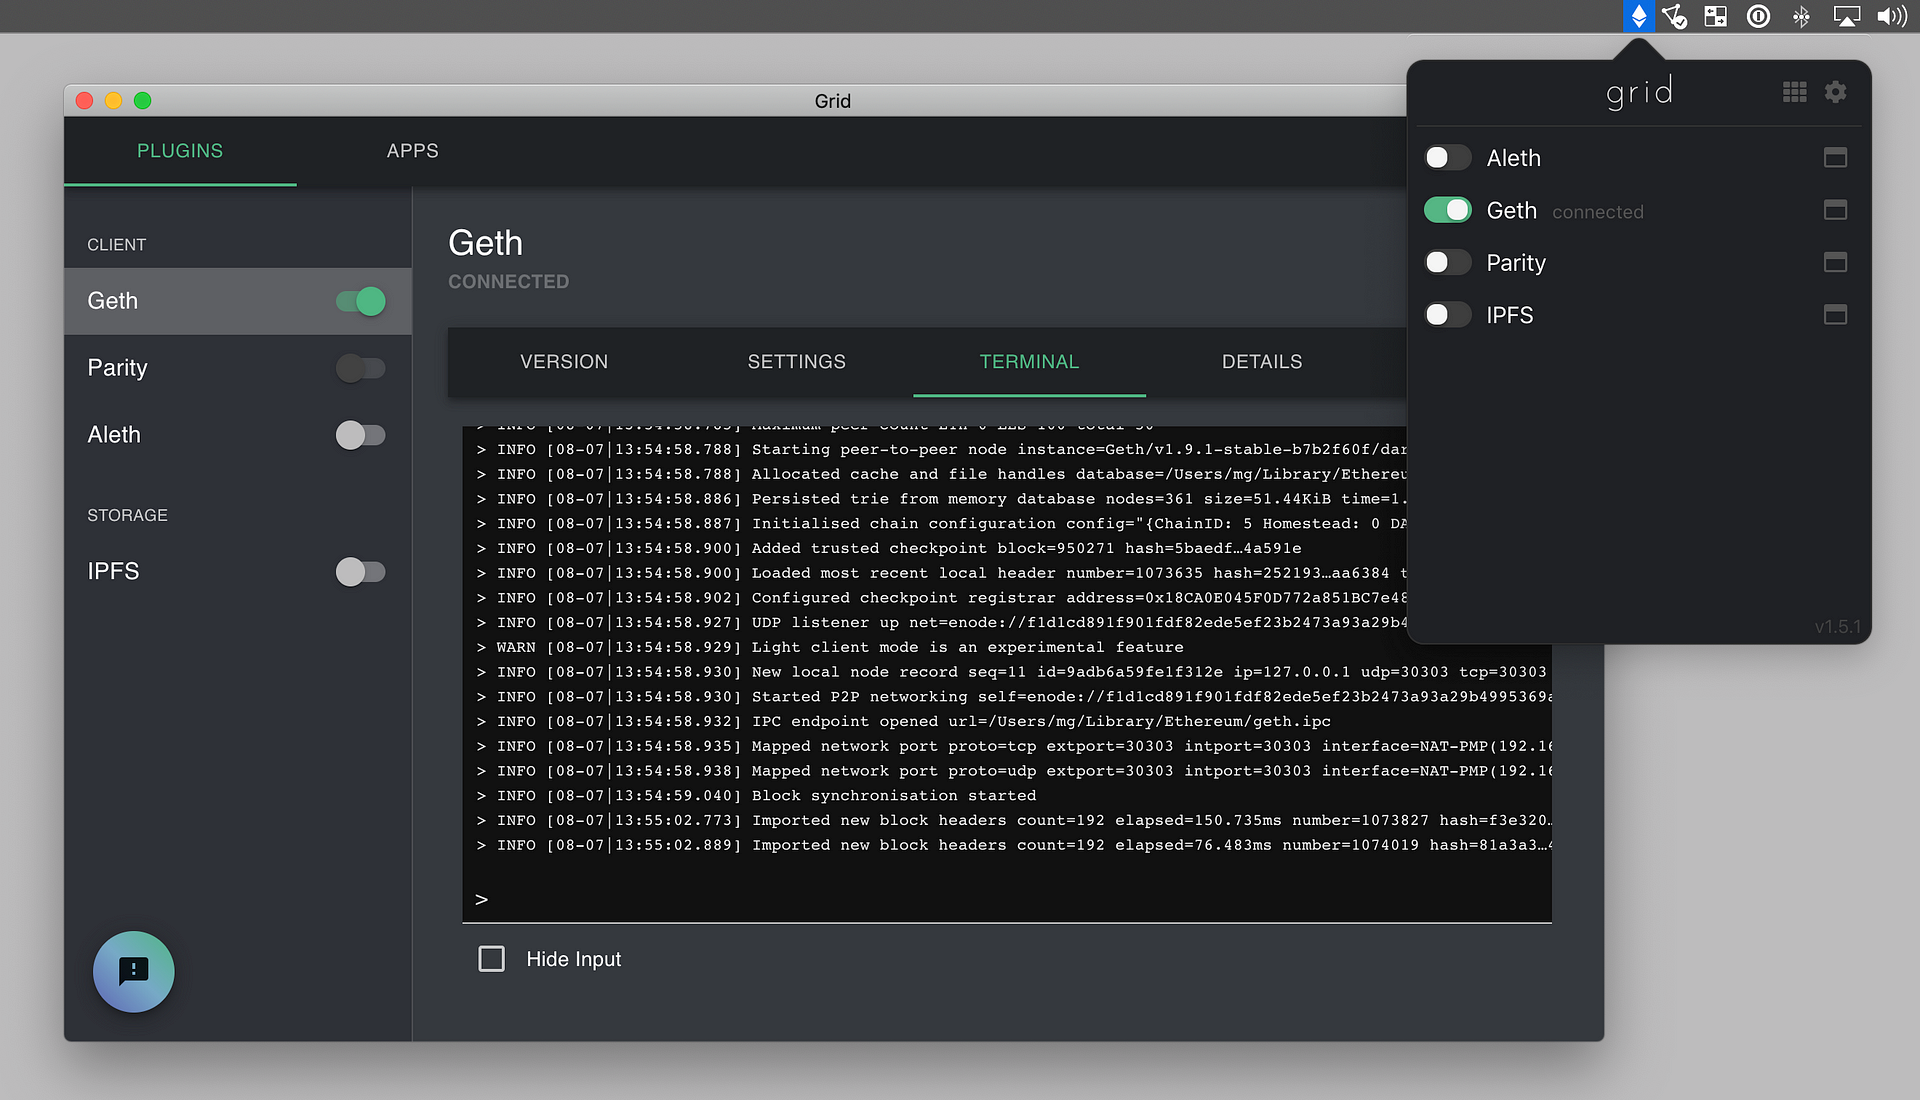
I got through writing this piece before I discovered Ethereum Grid, and official Ethereum Foundation project to make an easy-to-use, slick GUI for running nodes, and not just Geth — they’ve preloaded a bunch of different clients, it looks like. Here’s a screenshot from their GitHub:
I haven’t played around with Grid, and I do not know what the system requirements are, nor how smoothly it’s running. I mean this as no offense whatsoever, but I have found in the blockchain space much as in the rest of the world that the shortcut sometimes takes longer, so you may want to still follow the tutorial and get your node running the ‘hard way’. Even if you are going to use Grid, you may find the instructions below for setting up an external SSD and installing Go useful.
Another reason to run Geth from the command line may be attaching a Swarm node. Grid promises an app store for plugins, and they’re planning for click-and-launch functionality, but they don’t offer it yet (as of Nov. 2019 — feel free to check if anything has changed). It could be that attaching a Swarm node from the command line to Geth runnning on Grid is just as simple as attaching Swarm to a ‘regular’ Geth node, but I, unfortunately don’t know.
With all of those dissuasions, I do want to emphasize that Grid looks super-slick, and is an Ethereum Foundation project. It may be a good place to start, and may even be an easier experience than this tutorial.
Setting up an external SSD
(Special thanks are in order to Gregoire Jeanmart — this section is largely copied from his excellent tutorial for running a node on Raspberry Pi.)
If you’re running off an external SSD, here are some steps for setting it up. Use sudo fdisk -l to locate the drive. Here’s an example output from that command:
Disk /dev/sda: 931.5 MiB, 1000204886016 bytes, 1953525168 sectors Disk model: Kingston FF01BT2
Units: sectors of 1 \* 512 = 512 bytes
Sector size (logical/physical): 512 bytes / 4096 bytes
I/O size (minimum/optimal): 4096 bytes / 4096 bytes
(...)
Disk /dev/sdb: 465.8 GiB, 500107862016 bytes, 976773168 sectors
Disk model: Portable SSD T5
Units: sectors of 1 \* 512 = 512 bytes
Sector size (logical/physical): 512 bytes / 512 bytes
I/O size (minimum/optimal): 512 bytes / 512 bytes
In this case /dev/sdb is your external SSD. We’ll use this as the example moving forward, so if your SSD is at a different location, replace /dev/sdb with whatever location you gleaned from fdisk.
If you need to (re)partition the drive, use the following. This will wipe everything on the drive. Backup the contents elsewhere and then proceed:
sudo mkfs.ext /dev/sdb
Press ‘y’ when prompted.
We’re going to manually mount the SSD (replace _user_:_group_ with your username and group separated by a colon (:) — if you don’t know about groups, enter groups in the terminal and use the first option):
sudo mkdir /mnt/ssd
sudo chown -R _user_:_group_ /mnt/ssd
sudo mount /dev/sdb /mnt/ssd
We want the SSD to auto-mount at startup. Type in sudo blkid and get the UUID associated with the SSD (the one at /dev/sdb or wherever your SSD is). Copy it — we’ll need it in a second.
sudo nano /etc/fstab
Add the following (make sure to put a space after where you pasted the UUID):
UUID=_\*\*Paste UUID from blkid here\*\*_ /mnt/ssd ext4 defaults 0 0
Changes won’t take effect without a reboot, so if you want to keep on going and get Geth running, you’ll need to restart. Once you do, you can enter the following to see if the computer did indeed mount the SSD:
df -ha /dev/sdb
The output should include that /dev/sdb is mounted on /mnt/ssd.
Installing and setting up go
We’ll be running Geth, which is an Ethereum client written in Go, so we need to set up Go. The version of Go listed below is the most current version as of this writing, but feel free to check Golang’s site to see if there’s a more current version. We’ll assume a normal 64-bit architecture. If you run into trouble, check the website. Getting Go up and running can be a pain, so we’ll take a shot at simplifying the process:
cd ~/Downloads
wget https://dl.google.com/go/go1.14.linux-amd64.tar.gz
sudo tar -C /usr/local -xvf go1.14.linux-amd64.tar.gz
Note: this assumes go1.14 is the latest version of Go (which is the case as of this update (Dec. 8, 2019)). You can check here to see if this is still the case. If there is a newer version, you can remove 1.14, replacing it with whatever version is the most current stable.
We need to set the environment variables. There’s more than one way to do this, but here’s one:
sudo nano /etc/profile
This will open up the Nano text editor on the /etc/profile file. (If you don’t have Nano, sudo apt install nano should do the trick on Debian-like systems. Replace with your friendly neighborhood package manager if you’re on a different Linux.)
At the bottom of the file, add this:
export PATH=$PATH:/usr/local/go/bin
Press Ctrl+X , hit Y and ENTER to save.
sudo source /etc/profile
This should get it loaded up. If you type go version in your terminal, you should see something like go version go1.14 linux/arm as the output. If not, you’re in the wonderful world of Go troubleshooting and I wish you luck! You may have to wipe Go and reinstall it, but you can try to find something useful online about the errors you’re getting.
Installing Geth
Navigate to whatever folder you want to store the Geth source code in.
export GO111MODULE=on
go get -d github.com/ethereum/[email protected]
\*\*This may take a minute, don't worry
go install github.com/ethereum/go-ethereum/cmd/geth
Note: @1.9.11 tells Go to download version 1.9.11, which is the latest stable Geth release as of this update (Mar 6, 2020). You should definitely check here to see what the most recent stable release version number is — it’ll be the one in big print at the top of the page, replacing 1.9.11 with the version of the most recent stable release.
You may discover various problems with your Go installation at this point. See above, and the wider internet, if this occurs.
sudo mv $GOPATH/bin/go-ethereum/build/bin/geth /usr/local/bin
Now geth version should output information about your current installation. If it does, congratulations! You installed Geth.
Let’s make a data directory with permissions. (This assumes you’re using an external drive mounted to /mnt/ssd, otherwise replace with the internal location — something like /dev/sda1 ):
sudo mkdir /mnt/ssd/ethereum
sudo chown -R _user_:_group_ /mnt/ssd/ethereum
Syncing with Geth
If that all went well, we’re up and running with Geth and syncing.
There’s been a lot of progress in speeding up the initial sync with the current state of the chain, and there’s even cooler stuff being worked on. What this means is that you want to leverage a special syncing mode which should cut down the initial sync to several days. Try the following:
geth --syncmode fast --cache 1024--datadir /mnt/ssd/ethereum
(If it’s hogging too much memory, try turning down the --cache flag. --cache 256 works just fine, but it’ll take a few days to sync, whereas --cache 1024 should probably only need a couple of days. At 8GB of RAM my system is unaffected at --cache 256, if that’s of any help.)
If all is well, there should be a pretty solid stream of output. That’s great, but press Ctrl+C to stop it because we’re just checking if it works. We don’t want you to have to manually restart Geth each time you boot up, so we’re going to turn this into a system process (again, copied from Gregoire Jeanmart with permission.)
sudo nano /etc/systemd/system/geth.service
Once in Nano, type in the following (as before, replace _user_ and _group_ with your username and group.):
[Unit]
Description: Geth Node
After=network.target auditd.service
Wants=network.target

[Service]
WorkingDirectory=/home/_user_
ExecStart=/usr/local/bin/geth --syncmode fast --cache 256 --datadir mnt/ssd/ethereum
User=_user_
Group=_group_
Restart=always
RestartSec=5s

[Install]
WantedBy=multi-user.target
RequiredBy=swarm.service
Alias=geth.service
(Again, the cache above is set at 256. If you are running a dedicated node, or have a lot of RAM, you should probably crank this up to 1024 or even 2048. Also, I would recommend pulling off the --syncmode fast flag once you’ve synced.)
Ctrl+X, then Y and Enter to save changes. The following will reload system daemons, which will now include geth.service, then start geth, then mark this as a service to be launched at startup:
sudo systemctl daemon-reload
sudo systemctl start geth
sudo systemctl enable geth
You can check the logs to see if Geth is running:
sudo tail -f /var/log/syslog
Ctrl+C to get out. Gregoire has great information in his tutorial about the nature of syncing (it’s the section called ‘Syncing’) and has a whole other tutorial about how to set up a log and import it into Google Sheets (or similar) with awesome charts. I’d be copying it out word for word, so I’m going to leave you, awesome new node runner, to check it out yourself.
Note: the following two sections are meant for when your node has completely synced up, meaning both blocks and states. (See Gregoire’s article for more information.) Syncing state can potentially take a long time. Gregoire seems to have done so in less than four days, whereas I seem to be having a much harder time. Don’t worry! You(r processor) can do it. The next couple of sections are two cool things you can do with a fully synced node.
MetaMask
You have your own node now, so you should do awesome cool things with it. The first thing we’ll work on is decentralizing your MetaMask. (You should get MetaMask if you don’t have it already.) You see, MetaMask works out of the box by connecting to Infura, which is sort of a giant node some people run so that other people can query it. In other words, you have to trust Infura, and we’re way too cypherpunk to do that when we totally don’t need to. (No offense, Infura, you’re awesome.) You’ve got a node on your machine, so it’s rather silly to go calling Infura for information, anyway.
Exactly how to do this depends on your browser. (Here’s an answer from StackExchange this section is based on.) The basic idea is that Geth needs to be open to cross-domain RPC requests from the MetaMask extension in the browser. You’ll need to open up geth.service again — sudo nano /etc/systemd/system/geth.service, and add to ExecStart.
Chrome/Brave
--rpc --rpccorsdomain="chrome-extension://nkbihfbeogaeaoehlefnkodbefgpgknn"
If that doesn’t work, you may need to follow a similar process to what we’ll describe in Firefox and Tor. Search for how to get a Chrome extension ID.
Firefox/Tor
First, make sure that you have MetaMask, and that it’s not disabled (you can go to about:addons in the URL bar to see). Open a new tab, and type about:memory in the URL. Click measure in Show memory reports. Scroll down to Other Measurements, where there’s a section for browser extensions. (Or just hit CTRL+F and search for metamask.) You should see something like the following, but all on one line (formatting problems again):
Extension([[email protected]](mailto:[email protected]), name="MetaMask", baseURL=moz-extension://f3a66ea7-df4d-4731-80db-de45a4abebd6/
(Brought to you by this answer on StackOverflow.)
Using f3a66ea7-df4d-4731-80db-de45a4abebd6 as our example moz-extension, add the following to ExecStart in /etc/systemd/system/geth.service:
--rpc --rpccorsdomain="moz-extension://f3a66ea7-df4d-4731-80db-de45a4abebd6"
You’ll need to reload Geth for the changes to take effect:
sudo restart geth
Now to MetaMask. Open up MetaMask, and in the Networks menu, select Localhost 8545. MetaMask should connect to your node and you’re browsing Web3 using your own node!
Swarm
Swarm is part of the platform of technologies that Ethereum is a part of. It is a system for decentralized storage, much like IPFS. Once you have Geth synced with the chain, you should go the extra mile and configure Swarm. Eventually, the goal is that hosting data will generate profit (think of it as renting out your hard drive space), but don’t expect to see any profit any time soon. Then again, you have extra space on your spiffy SSD, so let’s do it:
go get -d github.com/ethersphere/[email protected]
go install github.com/ethersphere/swarm/cmd/swarm
This assumes 0.5.7 is the latest stable release (and also that the GO111MODULE is set to on, you can type export GO111MODULE=on in your shell if it’s not). Check here what the latest stable release is, and replace 0.5.7 with the most current stable release version.
Let’s move the Swarm executable into your bin so that you can call it from the command line without the whole path, just like we did for Geth. I can’t guarantee that your setup is the same as mine, but here’s what I did:
sudo mv $GOPATH/bin/swarm /usr/local/bin
If that fails, look around in the Go directory (you can type echo $GOPATH to find it) to find where the Swarm executable is.
You should be able to type swarm version in the console and get an output. You’ll need an account registered by your Geth node:
geth account new --datadir /mnt/ssd/ethereum
This assumes you are using the location _/mnt/ssd/ethereum_ for your node, as per the directions for attaching an external SSD above. If you are using a different location, put that after _--datadir_ instead, and if you’re using the default location, leave the _--datadir_ flag off entirely.
You’ll be prompted for a passphrase. It’s important that you remember this passphrase, as there’s no way to recover it if lost. Copy the output into a file in a clever location with a clever name (do not necessarily use the path and filename below), we’ll need this file soon:
touch _~/path/to/data.txt_
(The file does not need to end in txt, to the best of my knowledge.) You’ll probably want to restrict permissions to this.
Copy the passphrase into the file. Again, we’ll need this soon.
A word on full and light Swarm nodes
Before we get started, a quick word. Swarm, like Ethereum has a concept of full and light nodes. A full node is expected to be online pretty much all the time, so that it can serve the content that it’s storing. That means that if you’re running on a laptop, you’ll probably want to be running a light node. You’ll be able to receive content from Swarm, but won’t have the expectation of being available to serve. If this is the case, add the flag --lightnode to any commands starting with swarm here.
swarm --bzzaccount _\*\*Paste address\*\*_
You’ll be prompted for your passphrase. Paste it in, and the output should confirm that Swarm is running but — even cooler — if you point your browser to http://localhost:8500 you should see the Swarm gateway. Don’t worry if you can’t use an .eth domain, it’s because we haven’t configured ENS yet.
If you are seeing errors, don’t be discouraged. They don’t necessarily mean that the node isn’t working. I was getting a really heavy stream of errors of the following three varieties, and I was told I could safely ignore them, and that they will be taken out of end-user logs in the future:
ERROR netstore. Get can not retrieve chunk
ERROR not forwarding request, origin node is closer to chunk than this node base
ERROR dropping peer with DiscSubprotocolError
(I may have only gotten the third when I was closing the node.)
Ctrl+C out, since we’re going to turn this into a system process too:
sudo nano /etc/systemd/system/swarm.service
Once in Nano, add the following. Replace _user_ and _group_ with your username and group, as you did for geth.service, and put in the address you generated in Geth for address, along with the path to the file with your password using the --password flag.
[Unit]
Description=Swarm Node
After=network.target auditd.service
Wants=network.target
Requires=geth.service

[Service]
WorkingDirectory=/home/_user_
ExecStart=swarm --ens-api /mnt/ssd/ethereum/geth.ipc --bzzaccount _address_ \--password _/path/to/password.txt_
User=_user_
Group=_group_
Restart=always
RestartSec=5s

[Install]
WantedBy=multi-user.target
Alias=swarm.service
If you restricted permissions to the password file, make sure the service has the proper permissions to access it.
You’ll see that we’ve added ENS support. My experience is that it's really only worth it to run a Swarm node until you've synced the state (not just headers) from the chain. There isn't stable functionality until you've synced the state, and I've had experience with Swarm having spikes in consumption (maybe this is only a thing when you're running it with an unsynced client, though.)
If you want to know where you’re up to with syncing your Geth node, you can use the Geth console (geth attach /mnt/ssd/ethereum/geth.ipc, or whatever your path is), and type in eth.syncing. If it returns false, you’re all synced up on states. Otherwise you’ll get an object with some data. It's hard to know what percentage of the states you have (you can look up blocks on Etherscan), though.
We’re a few quick commands from loading, starting, and getting our service to start on startup:
sudo systemctl daemon-reload
sudo systemctl start swarm
_You shouldn't do the next one until you're ready for Swarm to autolaunch at startup_
sudo systemctl enable swarm
Congratulations — you are mightily contributing to a decentralized web in the background of your computer!
- Kauri original title: Run an Ethereum node on Debian with an External SSD (Mar 2020)
- Kauri original link: https://kauri.io/run-an-ethereum-node-on-debian-with-an-external-ss/a73723dd2e924d8c948923709763f409/a
- Kauri original author: William (@wschwab)
- Kauri original Publication date: 2020-03-08
- Kauri original tags: metamask, geth, nodes, swarm, systemd, debian
- Kauri original hash: QmczpCVLAjrXRV7smmvCoNvhj7cx497QFk3dNWfBTXp7Ry
- Kauri original checkpoint: QmZUeDv5bCt7vrRCQbwPMQf812VWip98dcsMJHdYdaiQ3d