Building a Distributed AppStore with 3Box

How to build an app with 3Box SDK and Plugins
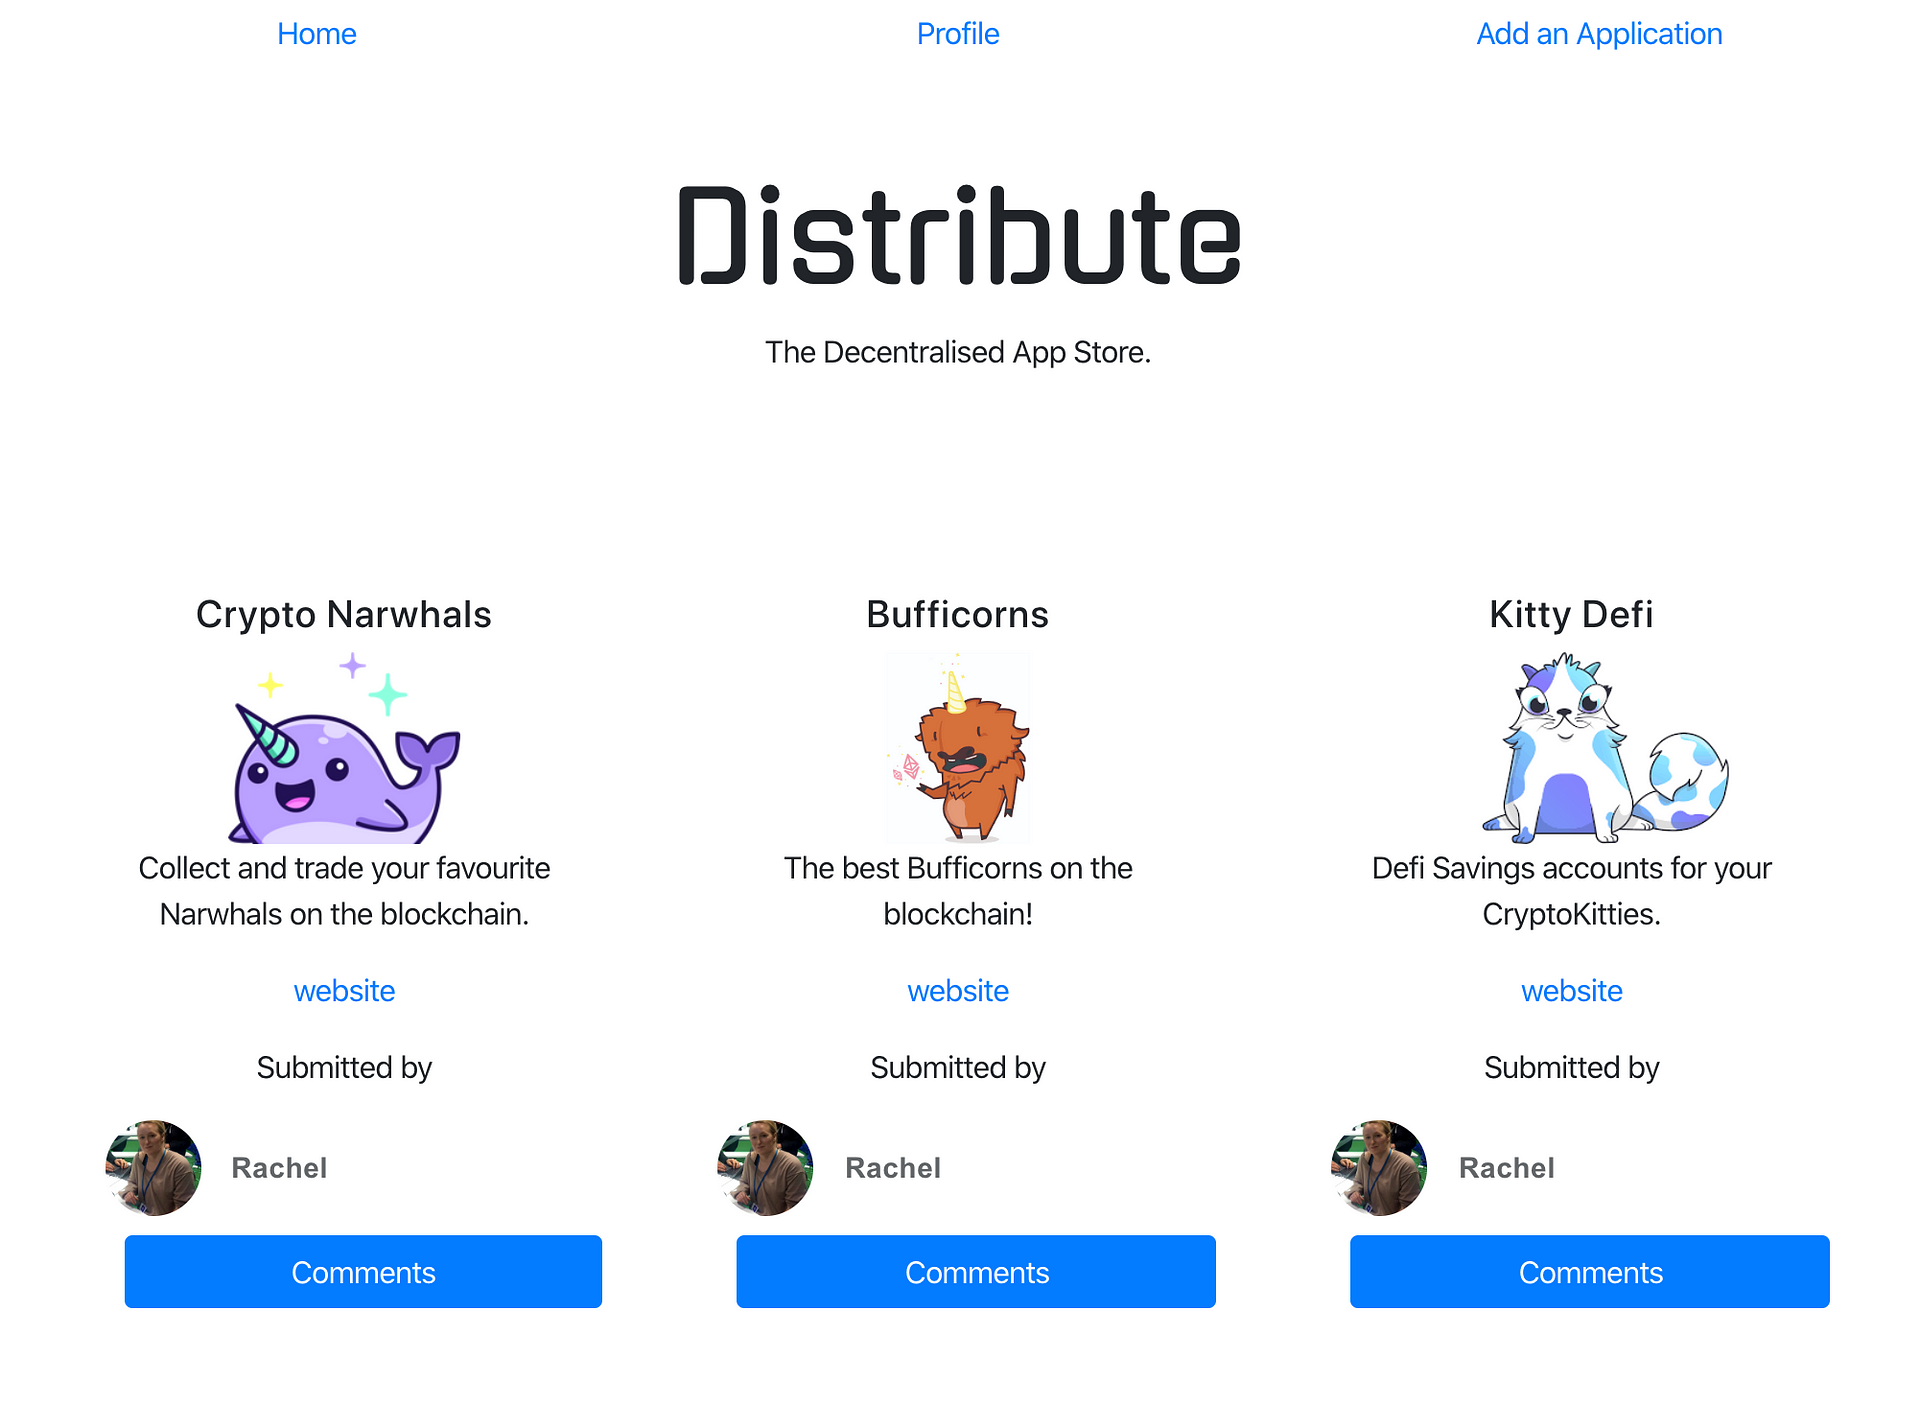
This tutorial will teach you how to build an app using 3Box. We will create a distributed appstore app using React, 3Box SDK, and 3Box plugins. Try the demo.
3Box allows developers to integrate distributed, user controlled data storage directly in to a frontend application. This is important as it is increasingly clear that on the traditional web, users have very little control, knowledge or agency over how their data is used.
Developers can integrate 3Box.js, the core 3Box SDK, which implements user-controlled, self-sovereign identity to give users transparency, consent and portability of their data. This is achieved using cryptography and public key infrastructure; cryptographic keys linked to each user’s decentralized identifier are used to sign and encrypt data.
Taking a more user-centric approach to user data management allows developers to build applications that will start to regain the trust of our users. No longer are we limited to storing user information and content in a centralized database with zero transparency as to how it’s used or secured. On 3Box, data is stored encrypted and distributed, and users are asked for their approval for data to be accessed or updated by an application. Not only does this prevent app developers from mining the data covertly without a user’s knowledge, but now developers don’t even need to worry about the set-up of databases or security of their users’ information.
Excitingly (especially for frontend developers like myself), this also means that we can build distributed applications with built-in data ownership, using purely frontend code, and without the need for servers, databases, or even smart contracts!
To illustrate what is currently possible with 3Box, I have created a distributed app store demo. This tutorial will take you through the steps of creating the application, so that you can build your own application with 3Box. By the end, hopefully you will be as excited as myself by the ease and potential of building user-centric apps with 3Box.
👉 Try the AppStore demo
Tech Stack
Our distributed application will include the following tech stack:
We are using React for this app, but you can use 3Box with other frontend technologies as well. Using React also allows us to use some of the 3Box prebuilt React plugins. Data will be stored on IPFS in OrbitDB instances. If you aren’t familiar with IPFS and Orbit: IPFS provides distributed file storage, while OrbitDB is used to create a database layer on top of IPFS.
Please note, this tutorial is 3Box and Web3 focused. We assume some react knowledge. For conciseness, we will skip over the details of creating all the react components. If you are completely new to react, we recommend spending some time to be come familiar before tackling this tutorial.
About 3Box
3Box works by deriving the database keys which control data in the 3Box system from a message signed by an Ethereum wallet. In this example, we are going integrate with MetaMask as the wallet provider, but you could also use any Ethereum wallet such as Fortmatic, WalletConnect, etc. The wallet will give access to an Ethereum provider, which will return the user’s Ethereum address and allow messages to be be signed by its private key using the personal_sign method. 3Box does not write to the Ethereum blockchain directly, and only needs a signed message from the wallet key pair. This means that there are no associated gas costs and that the 3Box ecosystem is not tied exclusively to Ethereum, opening it up to integrating with other blockchains in the future.
To get started, I used this boilerplate, built with create react app. This sets up the frontend to easily integrate with 3Box by enabling the Ethereum provider injected into the frontend by MetaMask.
First, install the boilerplate:
git clone https://github.com/RachBLondon/metamask-3box-boilerplate.git
This boilerplate app already includes code (below) which gives the app access to the user’s MetaMask address, which is then saved to react state. We also set up some basic react state to handle browsers that do not come with a provider, and therefore are not web3 enabled.
This all happens in the below function:
async getAddressFromMetaMask() {
    if (typeof window.ethereum == "undefined") {
         this.setState({ needToAWeb3Browser: true });
        } else {
         const accounts = await window.ethereum.enable();
             this.setState({ accounts });    }
}

async componentDidMount() {
    await this.getAddressFromMetaMask();
}
This function is called straight away once the page is loaded in componentDidMount. This is the simplest pattern to implement. We need to wait until after the page has mounted because MetaMask will not have had time to inject the provider into the page. This function also contains a flag to silence warnings about not auto refreshing on network change.
componentDidMount
Step 1 can be viewed in the codebase within App.js.
To use 3Box in your application, you will need to install 3Box:
npm i 3box
Now that we have enabled the Ethereum provider and have access to the user’s Ethereum address, we can start working with 3box.js.
First, instantiate 3Box at the top of the file as the Box object. Then, we can return to the componentDidMount function, and after we call getAddressFrom MetaMask we can add the follow lines:
Box
componentDidMount
getAddressFrom MetaMask
async componentDidMount() {
    await this.getAddressFromMetaMask();
    const box = await Box.openBox(this.state.accounts[0], window.ethereum);
    const space = box.openSpace('distributed-app-store');
    this.setState({ space, box });
 }
The first thing we are doing here is calling the openBox method on the 3Box library, this is an important step as it is where we authenticate with 3Box. If this user does not already have a 3Box account, one will be created for them. This is the stage in which the user's cryptographic keys are generated from a signed message. We pass in the user's Ethereum address, and the provider from the wallet, to facilitate signing of this message.
openBox
After using openBox to authenticate with 3Box, the next step is to authenticate a space. We can do this with openSpace method. This only takes one argument: the name of the space. This name will be used to namespace your space, so chose something unique and specific to your application. For this tutorial 'distributed-app-store' is fine. After we have authenticated with both 3box and our space, we can save both to react state for use later.
openBox
openSpace
'distributed-app-store'
Step 3 can be viewed in the codebase within in the App.js file.
The 3Box Threads API allows you to store shared data and messages in a collaborative manner. Each thread lives within a space — for more detail visit our architecture blog.
We will use threads to store the list of applications shown in our distributed app store. 3Box allows the choice of two different thread types: persistent or ghost. In this case, we want to ensure that the data is persisted, so that it is accessible to all users. Persistent threads does this by storing the data on IPFS within persistent OrbitDB feed stores. Side note: Ghost threads are great for chatrooms and more ephemeral data.
const thread = await space.joinThread("application_list", {
        firstModerator: moderatorsEthAddress,
    members: false
    });
Here we are joining the "application_list" thread, setting a moderator for the thread, and making it an open thread. 3Box provides three different types of persistent threads:
"application_list"
For our app store, we are using Open Threads as they give us the deserved functionality of allowing anyone to upload a new app. In the code snippet above, when we joinThread , this method will also create a thread the first time it is called with a unique name inside a space. Here we can see that we are setting the moderator to be the Ethereum address in the variable moderatorsEthAddress. The false Boolean flag on the members value will create the thread as an Open Thread.
joinThread
moderatorsEthAddress
false
Step 4 can be viewed in the codebase in App.js.
Now that we have successfully joined a thread, we can create a function to retrieve the previous posts, or data saved to that thread. In our case this will be the list of applications already saved to the thread.
const thread = await space.joinThread("application_list", {
    firstModerator: moderatorsEthAddress,
        members: false
});

this.setState({ thread }, ()=>(this.getAppsThread());
Here after we have created/ joined the thread, we save it to react state, and then call a getAppsThread function. Let’s have a look at that function.
getAppsThread
async getAppsThread() {
    if (!this.state.thread) {
            console.error("apps thread not in react state");
        return;
    }
    const posts = await this.state.thread.getPosts();
    this.setState({posts});
    await this.state.thread.onUpdate(async()=> {
    const posts = await this.state.thread.getPosts();
        this.setState({posts});
    });
}
Here we use two different threads methods to get, and update the posts in the thread. First of all, after handling the case when there is no thread in react state, we call the getPosts method, as you would expect this method retrieves an array of posts in a thread. After saving to the react state, we make use of another method onUpdate . This method takes a callback that will be called when an update or a sync to the thread is made. This is useful to handle new posts, and re-synching when the thread did not pull the most up to-date array of posts. In this case, whenever an update is made to the thread, we call the getPosts method again, and set the results to react state.
getPosts
onUpdate
getPosts
Step 5 can be viewed in the codebase in App.js.
Now that we have authenticated with 3Box, opened a space and a thread, we can write the code that handles contributing new applications to a thread. To do this, I created a component called AddApp (source code). This component will handle the UI and the method to add an application.
AddApp
First let’s decide on an app schema. For this demo, storing the following object will give us enough information to list store and list the application.
{
        name: "Test App",
    url: "https://exampleapp.com",
        appImage: "https://example-image.png",
    description: "An example application.",
        account: "0x2f4ce4f714c68a3fc871d1f543ffc24b9b3c2386"     //the account of the users who submitted
}
Next I created a react component AppForm (source code) with the following form.
AppForm
Next in the AddApp file, we can add the following function to save the data the user inputs to 3Box as as an application. Note this is a naive solution, as it does not handle any validation of the data.
AddApp
savePost = async formData => {
    // add the loggedin account to the form data to be saved
        formData.account = this.props.accounts[0];
    await this.props.thread.post(formData);
        this.props.getAppsThread();
};
Here the thread used in this application has been passed in as a prop, then we can us the post method on the thread to append the application object. This function will be called when the submit button is clicked on the form.
post
So far we have only been working with 3Box.js, however 3Box also provide a suite of drop-in react components. These plugins speed-up development by reducing the amount of frontend work that is required. To finish off this tutorial, we will be using three of these plugins:
Profile Edit Plugin
Providing user profiles makes for a much more human and engaging user experience. Let’s get started by creating a profile page (using react router to handle routing, see App.js).
Next we can npm i 3box-profile-edit-react and import it to the top of our file. We also need to pass on the space, box and user Ethereum address as prop to the profile edit component that is rendering the Profile Edit component.
npm i 3box-profile-edit-react
We can now start working with the Edit Profile component inside our render function.
{!this.state.hideEdit && (
    <EditProfile
        box={this.props.box}
                space={this.props.space}
        currentUserAddr={this.props.accounts[0]}
                currentUser3BoxProfile={this.props.threeBoxProfile}
        redirectFn={()=>(this.setState({hideEdit : true}))}
          />)}
{this.state.hideEdit && (
    <div>
       <h2>{this.props.threeBoxProfile.name}</h2>
    <img src={this.props.threeBoxProfile.image.contentUrl['/']}/>
    <p>{this.props.threeBoxProfile.description}</p>
    <p&/>{this.props.threeBoxProfile.emoji}</p>
       <button onClick={()=>(this.setState({hideEdit : false}))}
       </button>
</div>)
}
For more information, view our Profile Edit documentation.
Profile Hover Plugin
Now that we have added the functionality for users to edit and view their profile, we can also use the Profile Hover component. Rather than sitting in its own route, this component will work nicely on the page where we display the applications.
Here we can see we are rendering a basic card for each application in the thread (you can see how this is handled in Home.js ).
To use the Profile Hover component, npm i profile-hover and import in to the file. Then its simply a case of using it like a regular component. The only required attribute is address , we have added some styling and the showName attribute. Read more about the other attributes here.
npm i profile-hover
address
showName
<ProfileHover
    address={post.message.account}
        style={{ width: "100%" }}
showName={true} />
For more information, view our Profile Hover documentation.
Comments Plugin
The last plugin we will use is the Comments Plugin. We will use this to let users add comments to the application listed. First I created a modal for each application.
Next we can npm i 3box-comments-react . Then it is as simple as:
npm i 3box-comments-react
<CommentBox
    spaceName={'distributed-app-store'}
    threadName={'application_list'}
    box={this.props.box} // box created in step 2
    currentUserAddr={this.props.usersAddress} //users address from step 1
    adminEthAddr={"0x2f4cE4f714C68A3fC871d1f543FFC24b9b3c2386"} />
Here the adminEthAddr is the address of the administrator, who can delete posts. spaceName and threadName need to be consistent with those defined in step 2. Likewise box is the same as defined in 2. currentUserAddr is passed in as a prop to the comment, so it is referenced in that way.
adminEthAddr
spaceName
threadName
box
currentUserAddr
For more information, view our Comments documentation.
- Kauri original title: Building a Distributed AppStore with 3Box
- Kauri original link: https://kauri.io/building-a-distributed-appstore-with-3box/a9544b3cd4484369a97cb5171c420ceb/a
- Kauri original author: Rachel (@rachblondon)
- Kauri original Publication date: 2020-01-03
- Kauri original tags: 3box, ethereum, dapp, ipfs, identity, react
- Kauri original hash: QmSLy7G23eMpZmbeoGspXS2fmnUiv9JqL6tZ1YgXvh9WSj
- Kauri original checkpoint: QmUP9qZg9vxiTYmDyCRfVzpyYLQbtd6r3GAM7CyqCFhShv